Showing posts with label home. Show all posts

Tuesday, 16 June 2015

My new grey bathroom

It's been just over 2 years since we moved in to our house and the bathroom has always been an area that I've wanted to improve. I finally won over agreement from my boyfriend a couple of months ago so we got the refit booked up, giving us some time to source all the pieces and spread the cost out a bit.

For reference purposes - our old bathroom:

Old bathroom - a bit dated


We started off buying the suite. Based on a recommendation from our plumber we went with Victoria Plumb. He rated the quality you get for the price. After choosing an L-shaped shower bath we decided to stick with the square theme, going with a square basin, toilet and taps. We bought the following:

Boston L-shaped bath with shower screen
Verso toilet
Verso basin
Century basin and bath shower mixer pack (taps)

The century shower mixer from Victoria Plumb looked rather small and only came with a small clip to hold it on to the wall, so we got a separate shower head with a rail (again the square theme) this time from Victorian Plumbing.

The new suite


We also managed to source some bits from eBay:
Towel rail radiator
Custom size mirror
Toilet roll holder
Door stop
Aurora downlights
Chrome light fitting

Downlights and extractor fan


The radiator was an absolute bargain - it was listed as £99.99, but the seller had a deal on for 50% off any purchases over £50. So we got it for £50! As you can see from the pictures, it looks really classy and much more expensive than that. In fact, one of our re-fitters commented on how nice it was.

Towel rail radiator


I'm really pleased with the custom size mirror too. My boyfriend wanted a mirror to be sunk into the wall to sit in the tiles (rather than over the top of the tiles) so I had an idea that we get a mirror that is the exact size of 4 (2x2) wall tiles to keep all the lines neat.

Custom size mirror and Ikea Lillangen shelf
Ikea
Lillangen end unit

Amazon:
Manrose LED extractor fan

This particular extractor fan was a recommendation from our electrician, it's an extractor and a down-light in one. It's very quiet and seems to work quite quickly. You can also adjust the timer on it for how long until it switches off when you switch the bathroom light off.

Manrose LED extractor fan


The tiles was the hardest part. We made three separate journey's to Topps Tiles/B&Q to try and source some wall tiles and made no progress. On the third journey I suggested out of desperation that we check out Wickes (our Wickes is quite small  so that's why we previously discounted it). I'm sure you can guess what happens next  - we found THE PERFECT wall tiles in Wickes. The light grey Richmond tiles; they are a large rectangle matte grey tile.

The wall tiles and mosaics
Jewel diamond floor tiles

Once we sourced the wall tiles, it made the floor tiles and mosaics easier to pick. We went for the Topps Tiles Lynx grey mix mosaic and Topps Jewel Diamond tile for the floor. The mosaics are a mix of grey stone, glass and chrome and look really smart on the wall. The floor tiles are a dark grey tile with a jewel sparkle to them. They look really smart and expensive (actually, they were rather expensive!) with the grey grout that our tiler has used and when the spotlights are on the sparkle is amazing. They look like they have a sheen to them, but because of the texture of them they aren't slippery at all. They shine of them contrasts really nicely with the matte on the walls.


The photos I've don't taken don't really do the room justice. Our re-fitters (two guys) did an amazing job and everything is finished to a high standard. It took them 7 days in total. They ripped everything out on the first day and plastered over some bits of the wall where removing the tiles had damaged it. Then they fitted the bath, tiled the walls, plastered and painted the ceiling, boarded and tiled the floor, fitted the remainder of the suite and our accessories and sealed everything. Can I just mention the sealing too - round the edge of the floor and where the suite is sealed to the floor they used a grey sealant. It looks so smart and I didn't even know grey sealant existed!

We also had an electrician come in over two days to remove existing light fitting and fit extractor fan and down-lights.

The whole project I think must have come to about £3800 in the end. We originally budgeted for £3000, but the electrician took it up about another £600 (£380 for work, then we bought the parts), plus some other minor costs that cropped up. Once you start, you sort of think you might as well get the really nice bits and pieces as who knows how many years until you have the chance to have another new bathroom.

One thing I have learnt on this project is to find the products you want, then shop around online for the best price. Like I said the radiator was an absolute bargain, also the extractor fan we bought is currently £99 in Screwfix but we got it on Amazon for £60. The Aurora spotlights were also a better deal on eBay than other sites.

We've got the bug now for making our house looking pretty, so on to the next room....

Emma x

Sunday, 1 February 2015

Home office

My home office is finally finished. It has been a work in progress over the past few months. What started off as a bright yellow babies room (previous owners) is now a light and airy work space.

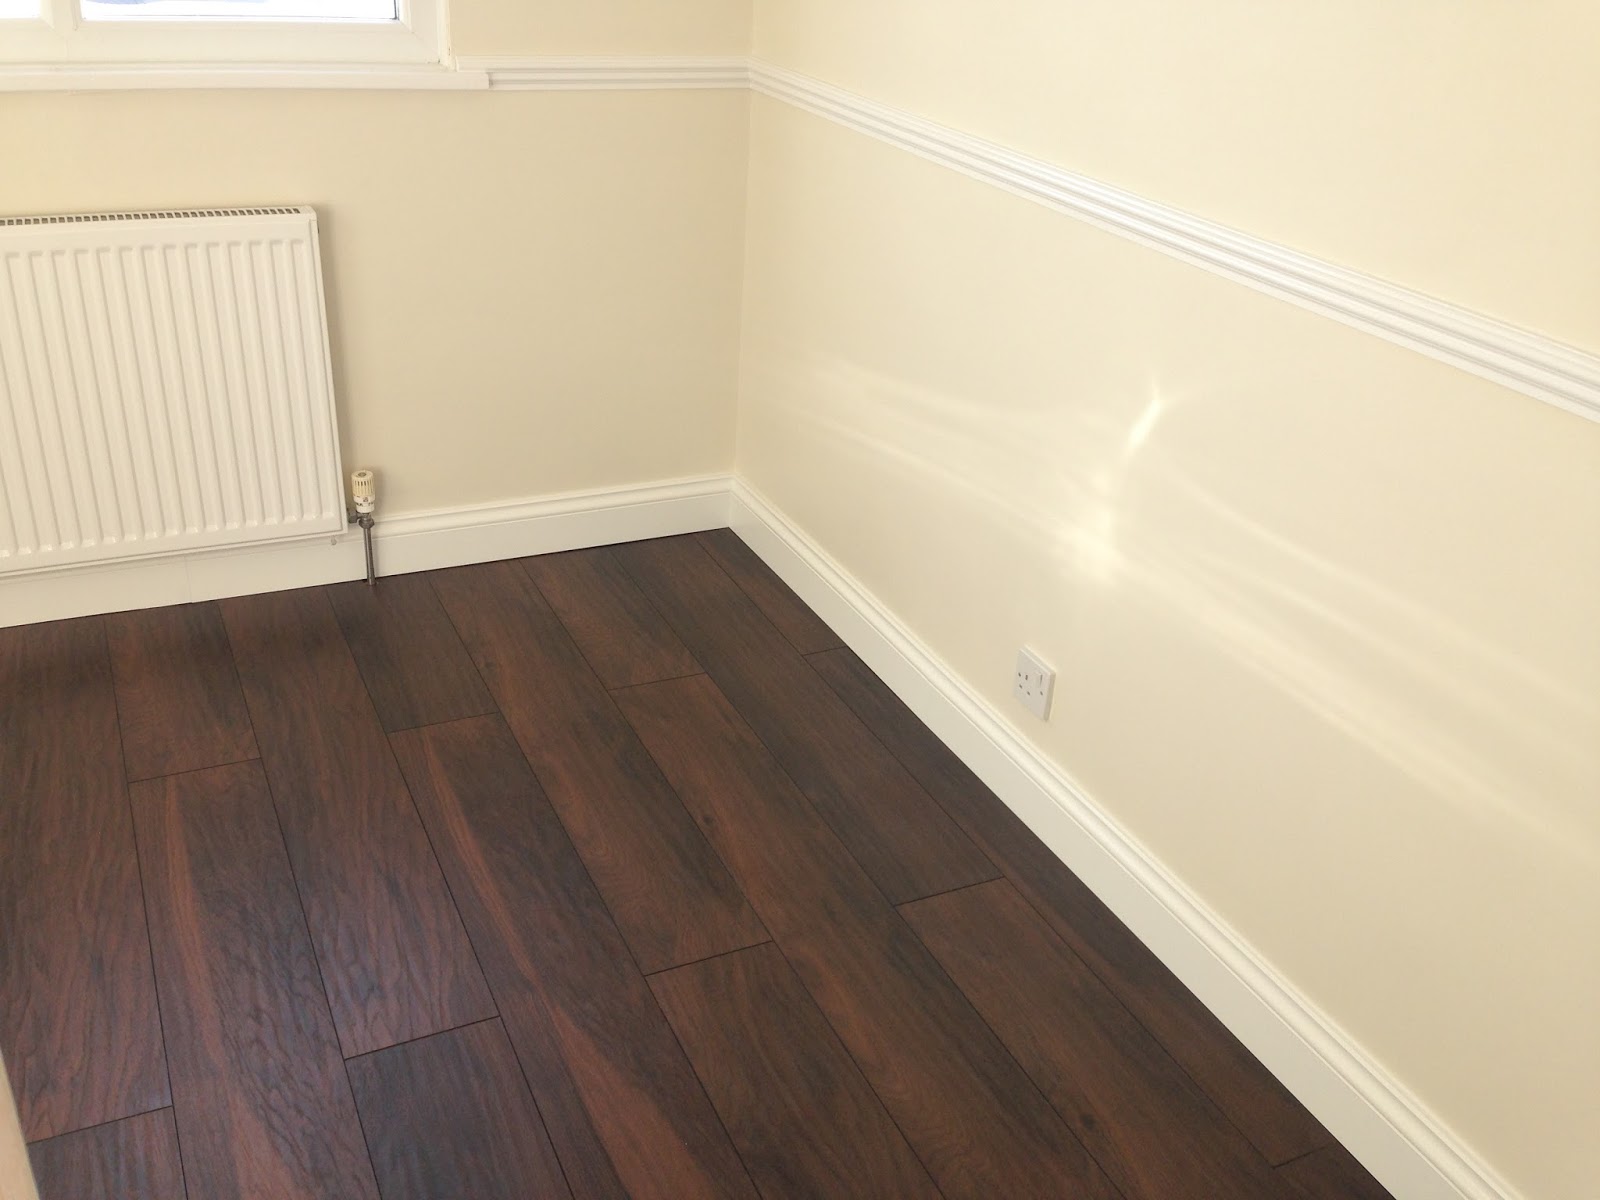
The walls were in pretty bad condition, so we started off by using the Polyfilla smoothover to plaster them, then sanded it all down. We also took up the old carpet and skirting boards. After painting the walls, ceiling, door frame and radiator, we laid some 5mm underlay and then some beautiful laminate flooring (Hickory smokey classic from Topps Tiles). It was suprisingly easy to lay the laminate flooring, I would advise anyone to DIY it if you don't want to pay someone to do it for you. It was made extra easy with a laminate cutter - no sawing needed.

We bought some 'no paint needed' white skirting from B&Q and got our carpenter to fit it for us. We could have done it, but don't own any power-tools so thought it best to get a professional in.

So, we went from this...


To this...


Next job was a trip to Ikea. I had always wanted a corner desk, but couldn't find a nice white one. So I compromised with the Malm desk with a pull out panel. It is effectively a corner desk if you want it to be, but the extra bit can be stored away when not in use. This is a great space saver as this is the smallest room in the house. We also got the clear tobias chair as thought it looked really smart and the lack floating shelves.


Finishing touches includeed a small billy bookcase, new light shade, dark wood venetian blind and some pictures on the opposite wall.


Now I have the perfect space to do my work and craft in. I love this room so much. I'm pretty sure it has increased my work productivity as I'm happy to spend time in here doing my work whereas I used to be at the kitchen table with lots of distractions around.

What do you think?


Monday, 12 August 2013

Make your own meal planner

I don't know about you, but I was getting into a bit of a rut where every evening it was a struggle to decide what to cook for dinner. Then on some occasions I decided what to have only to look in the refrigerator and realise that I didn't have that food in.

On browsing Pinterest one day, I discovered people had designed all types of menu boards to help plan their meal for the week.  Such as...

  
or


These inspired me to have a go at creating my own.

I liked the idea of using mini pegs to pin the meals so I ordered some from eBay. I then started to look for something I could make into a board. Then a Graze box popped through my door and after eating my tasty snacks I kept the box with the thought of finding a nice decorative paper to cover it. 

The box was left laying around for a couple of weeks until I had another brain wave. Inside the graze boxes there are pictures. So I thought I'd see if I could turn the box inside out and eliminate the need to cover it.

The boxes are put together by folding, so I carefully undid it like so...

Note this is a different box to the one I used on the finished product.

Then I put it back together inside out, and put a little tape on the side to hold it together. Next I took my pegs and wrote the days of the week on them, then glued them on the box with PVA evenly spaced out.

Then I took some other brown card (more recycled packaging) and made two little pockets to put the removable food cards in. I did debate over how many pockets to have and what catergories to use. I saw one on Pinterest that had "favs" and "quick" which I really liked the idea of, but then I knew I'd end up confusing myself if a meal fitted into both fav and quick! So I decided to go for meals that I have in and meals that I don't.Again I used PVA to glue these on.

Then I cut out the cards to write the meals on from an old cereal box. And fially here is the finished meal planner! Not the neatest or most professional looking, but it does the job and has got me out of the meal decision quandry every day.


Monday, 5 August 2013

Green and brown "earthy" bedroom decor

I've done quite a bit of decorating since getting my own place a couple of years ago and I've been an independent woman and done the bulk of it myself. So I thought I'd share some of my interior design ideas to maybe inspire others and let you know of issues I had in case they help people in a similar situation.

My green and brown room is my second bedroom/guest room. I liked the idea of using brown/neutral colours for this room and my boyfriend showed me this picture of a green room with brown furniture which I really liked the look of.

I thought the room might look too dark for a bedroom if I painted all of the walls a strong shade of green, so I decided to do a darker feature wall and the other walls a lighter shade. I should also mention, there is laminate flooring and I painted the ceiling white.

Three of the walls are the Dulux shade "apple white", which is just a hint of green.

The feature wall is Dulux "putting green".

For the corner of the feature wall I purchased a wall transfer with a brown branch design from eBay. I bought a brown suede look lampshade and matching curtains.

I finished the room off with some brown faux suede curtains and a lamp shade and voila!

Here is the finished room:


Update: Moved house since starting this post.

Thursday, 17 January 2013

My dressing table or 'vanity' area


When I bought my first home, I started my decorating spree with my bedroom. Previously I had lived in rented accommodation, so had never bothered to buy decent furniture or been allowed to do any decorating.

I'm not going to lie, it was hard work! I remember ringing my Dad on one occasion, crying down the phone that it would never be finished (drama queen!). The previous owner had just painted over this horrible textured wallpaper on the ceilings as well as the walls, so it took weeks to remove. But, a couple of months of hard work and toil and finally my bedroom was complete.

The first piece of new furniture I bought myself was my dressing table. I actually spotted this in Homebase before I even moved, and knew I wanted it. It is a penny shy of £200, but as luck would have it, Homebase were having a 20% off furniture sale so I managed to get it for around £160.


On my dressing table I've got my makeup and perfume. There is some fairy lights hanging round the mirror, a couple of sparkly coasters on the top, a sparkly picture frame from Junction 18 and my "little brown bag" makeup bag from Bloomingdales. In the draws I've got some of my main "go-to" hair bits and bobs (clips etc) and a smaller mirror I used to check the back of my hair.

The majority of my makeup is stored in my acrylic Muji storage, which you can read about in more detail here.   


I am so proud of the work I did on my room, and love sitting at my dressing table and experimenting with my makeup. When we move, I'm going to try and convince my boyfriend that I need one of the bedrooms as a dressing room as I get up much earlier than him for work. Wonder what my chances are?! ;)

Wednesday, 21 November 2012

Sparkly bling glitter coasters

It feels like I haven't written a blog for ages! Work has been so manic at the moment and I'm also in the process of selling up and buying a new house.

That leads me nicely on to the topic of today's blog - a little bit of home decor. I found these gorgeous sparkly/glitter coasters in a local shop the other week and I HAD to buy them. They are just so me!

They came in a pack of 4 for £4.99 and I've scattered them around the flat. I've got two on my dressing table, one on a radiator cover and one on the mantel piece.

Do you like...?


She Said Beauty