Showing posts with label polish. Show all posts

Wednesday, 15 June 2016

Sally Hansen complete salon manicure review

I spotted a newly large stand of Sally Hansen nail polishes in Boots recently and was taken in by the gorgeous range of colours. I decided to get a freebie with my advantage card points and give one a try. I went for the barbie-esq pink "Aflorable" in the complete salon manicure range.

The range sounds amazing, with the Sally Hansen website boasting the following 7 benefits in one bottle:

"Featuring a base coat, growth treatment, runway-inspired color, top coat, gel-shine finish, chip-resistance, and a strengthener with keratin complex for up to 64% stronger nails, this all-in-one formula delivers up to 10 days of chip-resistant wear. It’s everything you need to achieve a professional nail look at home!"

Sally Hansen complete salon manicure


When I first applied it I was a bit dubious about what kind of results I would get. Although the brush was a great size and shape the polish didn't seem to apply very evenly. However, it seemed to even out when drying and by the time the third coat was dry they were shiny and opaque. (Two coats didn't quite leave this colour looking opaque.)
Now 5 days along the line, they are pretty much chip free apart from my fore finger and thumb on my dominant hand. Staying chip free for this long is pretty much unheard of for me, so I am really impressed. I've even done my toes to match (although it has rained non-stop since, so I haven't been able to wear sandals and show them off).

I can see more colours from this range finding their way into my collection soon. What colours would you recommend?


Monday, 4 April 2016

OPI Nail Envy review

I recently bought the OPI Nail Envy in Hawaiian Orchid after seeing a picture of it on Instagram and falling in love with the colour. At the time, the fact that it was a nail strengthener never really entered my mind. I'd tried various nail strengthening potions in the past and never found they'd made a shred of difference. It was purely all about the colour.

OPI Nail envy
OPI Nail Envy Hawaiian Orchid

I applied Hawaiian Orchid practically as soon as it landed on my door step. I'd never tried OPI before, so it immediately struck me how great the formula is and how much I love the shape and size of the pot - its really easy to hold and apply. Although it seemed thinner than a regular nail varnish when on, it was opaque after two coats and the colour was as I'd hoped for; a beautiful dusty pink.

I headed back to the Internet to see what other colours they did in the range and came across Bubble Bath. The pictures I saw of it, made it look like a lovely opaque pale pink, my thinking was perfect for spring.

OPI Nail Envy
Top: Hawaiian Orchid, Bottom: Bubble Bath

When Bubble Bath arrived, I did think it didn't look as pink as I'd imagined it would from the pictures, it is more of a nudey pink. I was slightly disappointed when applying it to realise it was not going to be opaque after all like I'd hoped for. The photos above are with three coats of Bubble Bath and you can still see my natural nail underneath.

However, after my initial disappointment with the colour it struck me a few days later how healthy my nails were looking. Throughout my teenage years and my twenties I'd struggled with nail biting and had weak nails that peeled and would easily break probably as a result of that. I haven't been so bad the past couple of years, but my nails always still seemed weak and would break easily. But all of a sudden I have noticed that I have some length to all of my nails and no breakages. I can only attribute it to Nail Envy, a miracle worker in a small bottle.

If you have problems with weak, breakable nails I would definitely recommend you try this. I now intend to buy the original Nail Envy to use as a base coat under all of my other nail polishes.


Sunday, 22 February 2015

Models Own chrome polish

Hello everybody!

Just a quick one today as I haven't posted in a while (work has been cray-cray!). 

I came across the new Models Own chrome range on Instagram last week as I think a few bloggers were sent pre-release samples. It was love at first site for me. So, when it came out on Monday I hunted round Boots and Superdrug stores across two town centres, and in the fifth shop which happened to be a Superdrug I found them!

I went for the indigo which was the one I lusted over most on Instagram, but I was equally tempted by the others - especially the rose gold! However at £4.99 each and with a full acrylic stand of nail varnishes at home I resisted going crazy. If there had been an offer for buying multiples I probably would have though.


Have you tried the chrome range yet? 

Thursday, 28 August 2014

Bargain gel nail polish

Just picked up these "Gel Perfect" 5 minute manicure polishes from Poundworld! Bargain or what?!


I got orchid and purple luxe. Watch this space to find out if they are any good or not. The packaging says no UV lamp needed and that it sets rock solid in 5 minutes. We shall see...

Friday, 31 January 2014

Week 4 manicure challenge

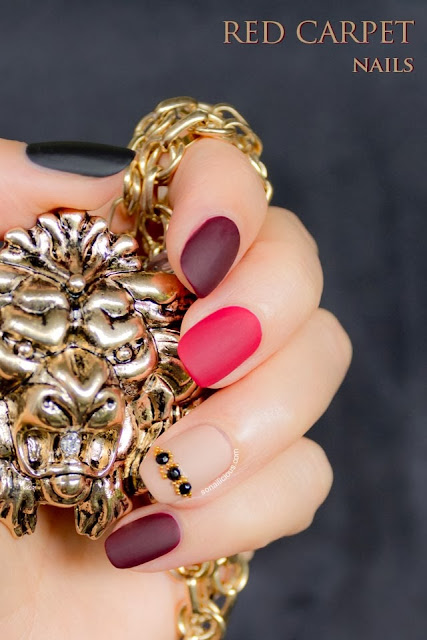
This week I have rediscovered my Rimmel matte polish. I have gone for multi-coloured nails with a jewel effect design on the ring fingers using my nail dotting tools.  


I was inspired by this look on Pinterest, but mine look no where near as classy. Nevermind though as I enjoyed trying something different.


Friday, 8 November 2013

Freebie Kate Spade nail polish

The December edition of Glamour is out now and comes with a free Kate Spade nail polish. There a four Christmassy shades to chose from; gold, silver, red and black. 

The nail varnishes are normally £11 and the mag only costs £2. Definitely worth picking up a bargain.

I've gone for black. Which will you chose?


Tuesday, 27 August 2013

Pink ombré nails

I was going to go for a nice bright pink summery nail varnish today but couldn't pick which to use.

So I decided to put together 5 pink shades and do this ombré look. If you have the polish, then why not eh?! 


It's not the best graduation of colour, but it looks quite fun. 

I would love to see your ombré efforts. Feel free to post a comment and link to your blog so I can have a mooch.

Tuesday, 6 August 2013

My first time at nail stamping

Today I had my first go at nail stamping! My sister came over at the weekend and lent me some bundle monster plates so I thought I'd give it a go. I won't go through the "how to" as there are so many videos on YouTube on the subject and they are all quite easy to follow. 

I started off by doing a couple of coats of Rimmel's Marshmallow Heaven then used Barry M's silver foil effect for the stamping as recommended by my sister (thanks sis). Finally I topped it off with a top coat to protect my pretty stamps. Note to self for future; try to apply top coat in one swipe as if you keep going over a spot it smudges the stamp.

Overall, it's a fairly easy method to come up with really effective results. It is harder to do the hand you write with as I'm sure you'd expect, but not impossibly hard.

I think I'll invest in some plates of my own.

 
I used bundle monster plates 213, 317 and 320.

Friday, 31 May 2013

New MUA nail varnish review

MUA nail varnish:

Since discovering MUA, my makeup collection has been able to grow wildly without me spending wildly. On my courtesy look through the makeup stands in Superdrug yesterday I discovered they had a new nail varnish range out. Cute little bottles with the MUA letters shaped on the glass and a lovely range of bright colours ready for the bright weather (we can but hope), and they only cost £1!


I picked up a lovely bright pink with a hint of orange called Bright Coral and a white called All Nude. Obviously too excited to try one at a time, I tried them together, here are the results.


The colours and great, and so far so good on the chip-free staying power. The brush was a good size and got a nice even coverage of the nail. They were also quite quick to dry. The only downside is that they are quite thin and require 3 coats to ensure that they are opaque. I did 3 coats on the white and only 2 on the coral and I'm regretting that now.

Overall, I'm really happy with them and for £1, I can't really fault them at all, so for that reason I am giving them 5 stars!


Monday, 15 April 2013

Ciaté nail polish free with Marie Claire

This month's Marie Claire comes with a free Ciaté nail polish (and a Jergens moisturiser).

There are two great colours available; a pastel peachy pink called Pocket Money and a light shimmery gold called Sand Dune.

These are well worth the £3.80 you pay for the magazine seeing as Ciaté polishes retail at £9.

The colours are a great addition to my collection and perfect for Spring. They complement each other nicely too.


Wednesday, 3 April 2013

Nail Polish Stand

Greetings from my new house! It's been a very busy and stressful couple of weeks, but I'm absolutely loving having a house. (Lots of home decor posts to follow).

The first thing that I decided to buy for myself in the new house is a nail polish stand. I've been looking at a few on eBay for a while but didn't want to buy before the move. I ended up ordering one from Amazon for £7.99.

I've got the muji acrylic draws already so wanted to go with the clear acrylic look to match. It fits approximately 30 bottles on it and is nice and sturdy. I would definitely recommend.


Wednesday, 20 February 2013

Moschino nails from London Fashion week

Here is my take on one of the Moschino Cheap and Chic nail looks from London Fashion Week 2013 by Mac manicurist Marian Newman.


You can read all about the Moschino Cheap and Chic look here. Thanks to Hollie Wakeham for keeping us all updated on the LFW goings on via Instagram.


Sunday, 28 October 2012

A classy stripe - nail art with decorative tape

A little while ago I came across this picture on Instagram:

I thought it looked like a really classy manicure and wondered how they got the silver lines looking so crisp and straight. Then one day, whilst browsing on eBay, I discovered the answer - nail art tape!

I ordered a set of 10 different colours from Hong Kong for the bargainous price of £1, and they took a couple of weeks to arrive.

When they arrived I had just painted my nails blue the day before, so I picked the red tape as I thought it would go nicely against the blue. I hastily watched a couple of videos on YouTube on how to use the tape and set off on my "easy" hand.

It is very tricky to do on yourself, particularly cutting it close to the edge of the nail. If you aren't careful you will pull the tape to a funny angle or even completely off.

After sticking the tape on, you need to put a top coat of nail varnish to seal it. I liked the look a lot! What do you think?


I only got round to doing one hand as my boyfriend came round for dinner. I was going to try do the other hand after, but disappointingly the tape had completely come off one finger and was peeling at the edges on 2 other fingers. This may be down to the fact that I used a matte finish top coat rather than a normal one, so I'll have to give it another go at a later date when I've got a bit of time (this is not a quick mani by any means).

Update
Black and gold version:


Friday, 31 August 2012

Triangle nails

Ease: ★★★★★
Effectiveness: ★★★★★


This is my last post in August. Since I started this blog a short while ago, I've clocked up just over 400 views. Thanks to everyone who has read and commented on my posts.

Anyway, back to business...


I saw this style of manicure on the Cute.A.S.Nails blog recently and decided it was something that a person of my novice nail skills could do.

I used my Rimmel nail varnish that I've mentioned before in previous blogs. I started off with a couple of coats of the marshmallow heaven, then used the matte finish top coat. Once it was fully dry I taped the points on the nails and used a thick coat of pear drop to create the triangles.

This is the finished result!

Friday, 27 July 2012

Chevron/fishtail nails

I came across this nail technique on Robin Sparkles blog and thought it looked really effective, so here is my attempt!

The good thing about this technique is that it is pretty easy to do with your wrong hand as well. So both hands end up looking decent.

I used Rimmel nail varnish in 702 Marshmallow Heaven, 703 Peardrop and 239 Your Majesty.

Monday, 16 July 2012

Fishtail braid nails

I came across fishtail braid nails on Twitter a few days ago and it was love at first sight! They look so effective, especially if you get the colour balance right. I had to try this method straight away...
Fishtail manicure steps nail polish varnish
www.lucysstash.com


I bought some Rimmel nail polish at the weekend thanks to a nice little offer in Boots, so thought the fishtail manicure would be the perfect way to try it out. I used Rimmel Lasting Finish in 702 Marshmallow Heaven, 703 Peardrop and 025 Strawberry Fizz.

Rimmel Nail Polish Varnish, Marshmallow Heaven 702, Peardrop 703, Strawberry Fizz 025

As this was just a first attempt practice type thing I only did the full fishtail on my thumbs, on the other fingers I did two diagonal swipes on the tips.


Also I must mention that I did this freehand-it's bloody hard! With hindsight, maybe tape would have helped.

However, I'm pretty happy with the result even if it's a bit on the scruffy side at close inspection.


What do you think?!

She Said Beauty